Please note: Before you begin, you MUST have the LTI 1.3 Public key in JWK format from Nimblywise. If not, please contact Nimblywise support. This must be completed by someone with administrator access to Moodle.
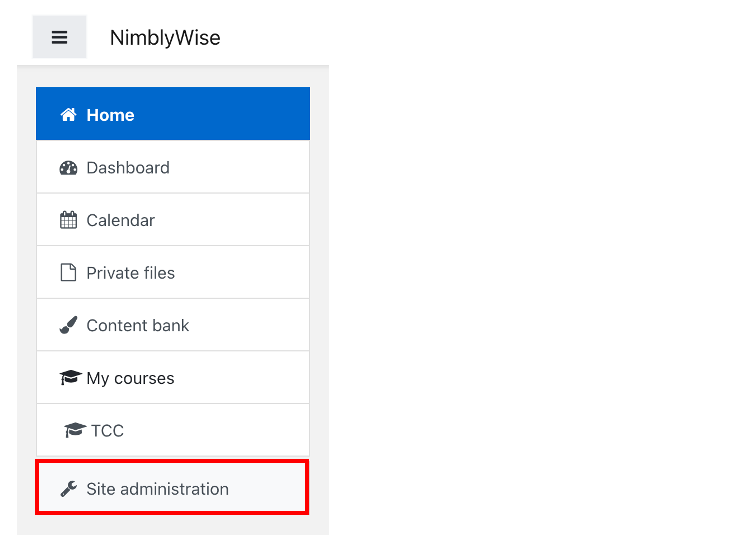
Step 1: Once you are logged into your Moodle as an administrator, select “Site Administration” from the left-hand navigation menu.
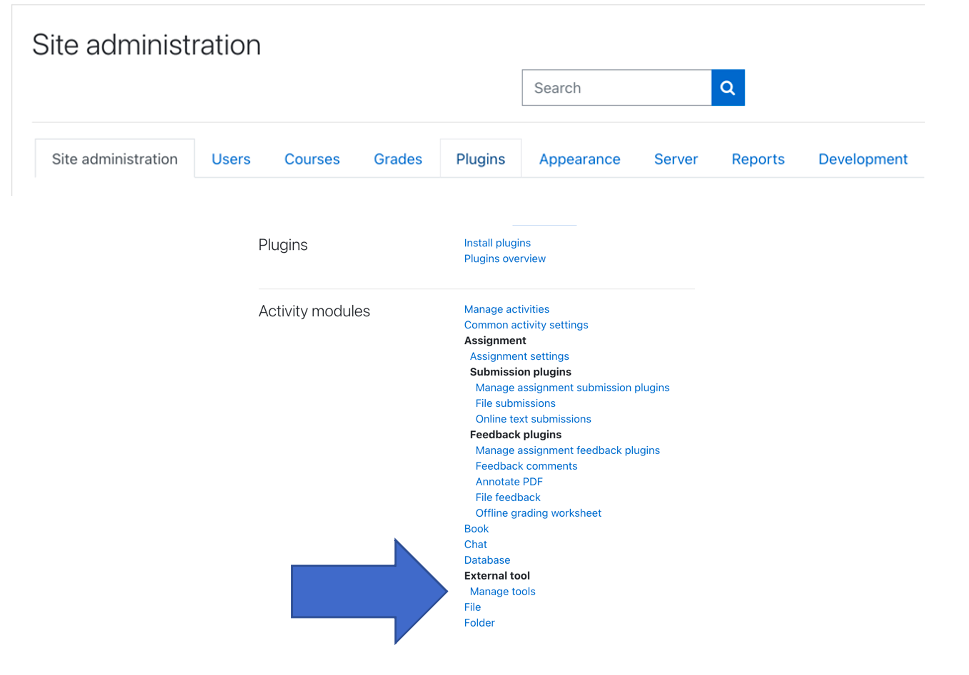
Step 2: From the menu tabs, select “Plugins”, then under the “External Tool” heading, select “Manage Tools”.
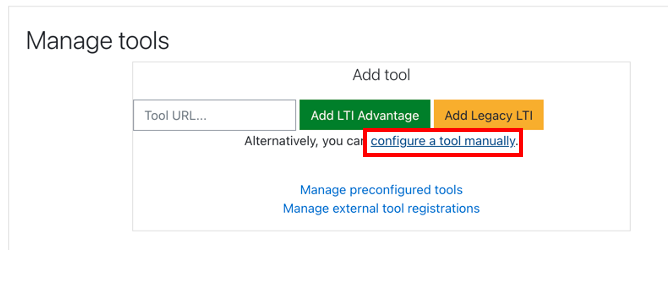
Step 3: From the “Manage Tools” menu, select “Configure a tool manually”.
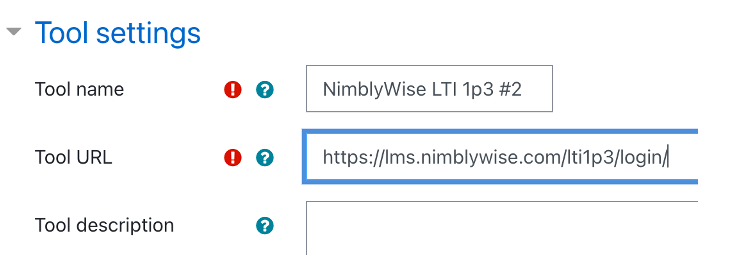
Step 4: Enter a name for your tool and then add then your Tool URL (provided by NimblyWise):
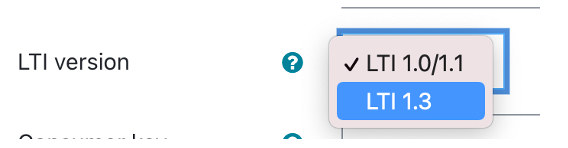
Step 5: Change the LTI version from “LTI 1.0/1.1” to “LTI 1.3”.
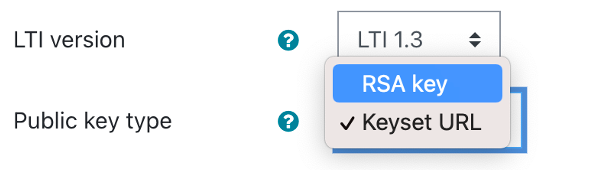
Step 5: Change “Public Key Type” to “RSA key”.
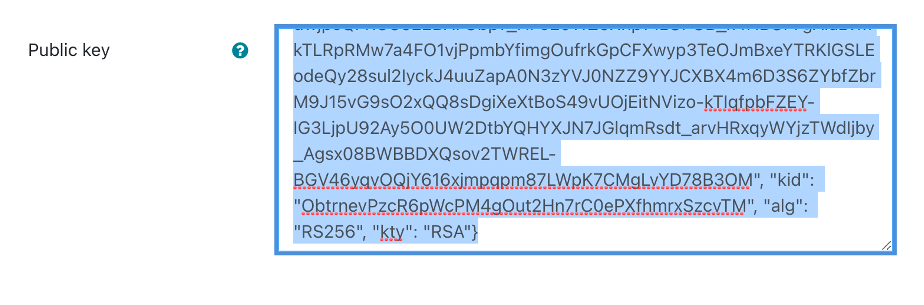
Step 6: Enter the key provided by NimblyWise into the “Public Key” box.
Step 6: Type the Initiate login URL next (https://lms.nimblywise.com/lti1p3_tool/login)

Step 7: Add your Redirection URI(s). NOTE: You MUST include each deep link URL (provided by NimblyWise) in this box or the link(s) will not work. Each link should be placed on a separate line (meaning you must use the enter button after each is entered).

Step 8: Enter the following text into the “Custom parameters” field: Email=$Person.email.primary

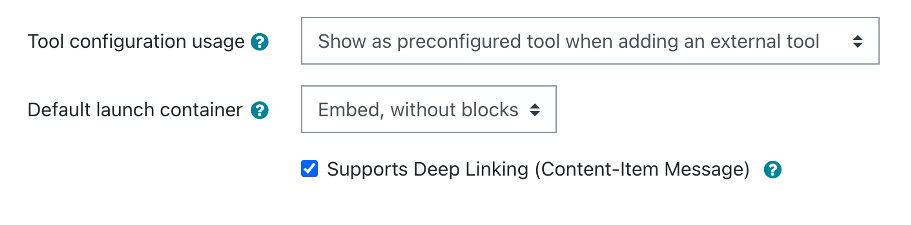
Step 9: “Set Tool configuration usage” and “Default launch container” as shown. Check the box for “Supports Deep Linking (Content-Item Message)”.
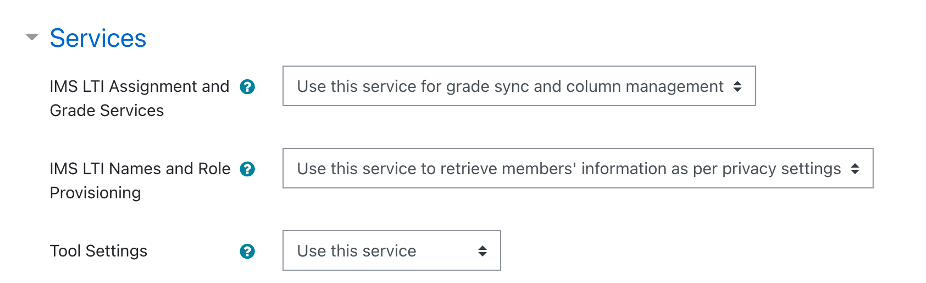
Step 10: Click the arrow next to “Services” and ensure the following settings:
- IMS LTI Assignment and Grade Services: Use this service for grade sync and column management
- IMS LTI Names and Role Provisioning: Use this service to retrieve members’ information as per privacy settings
- Tool Settings: Use this service
Step 11: Click the arrow next to “Privacy” and ensure the following settings:
- Share launcher’s name with tool: Always
- Share launcher’s email with tool: Always
- Accept grades from the tool: As specified with deep linking definition or delegate to teacher
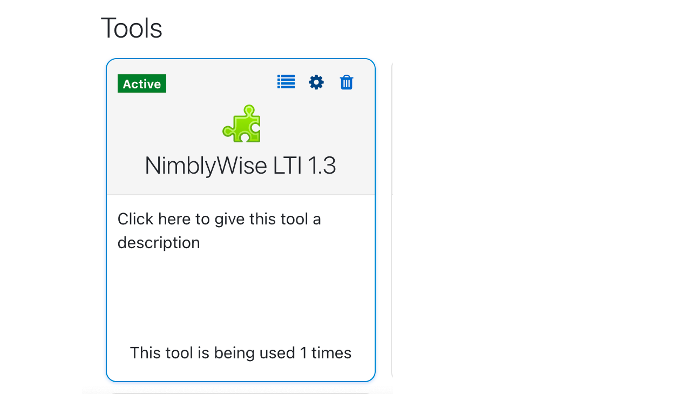
Step 12: When complete, choose “Save changes” and the tool should appear as below.

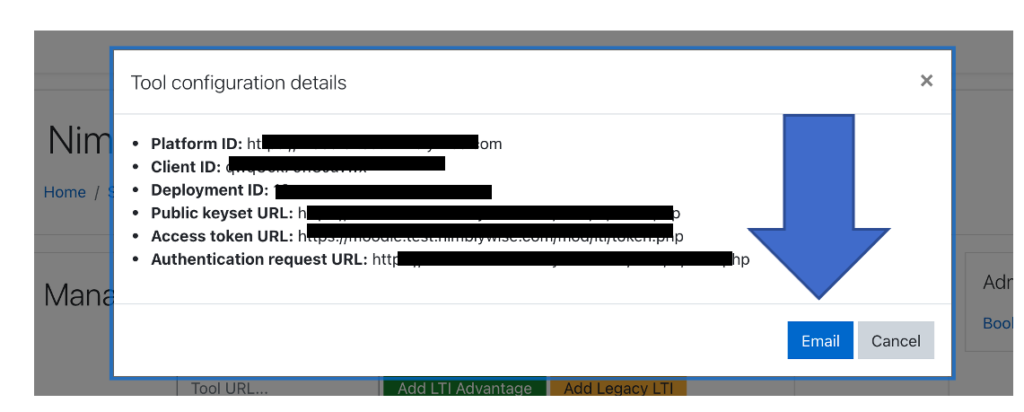
Step 13: Choose “View configuration details” icon (shown below), then select “Email” and send the details to NimblyWise Support (support@nimblywise.com) to continue the LTI 1.3 setup process.