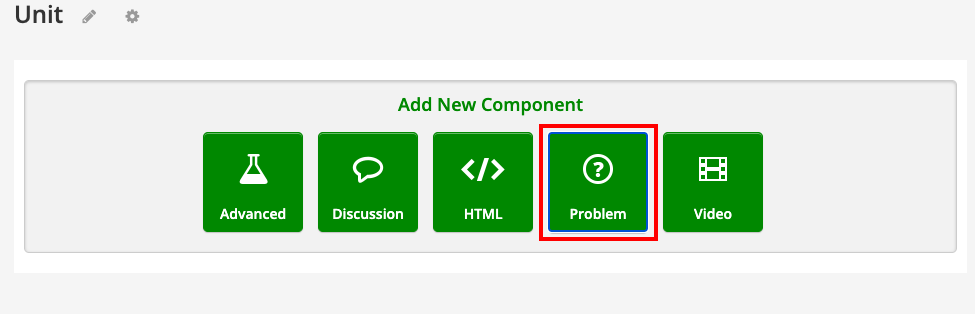
Step 1: Under Add New Component, click Add Problem
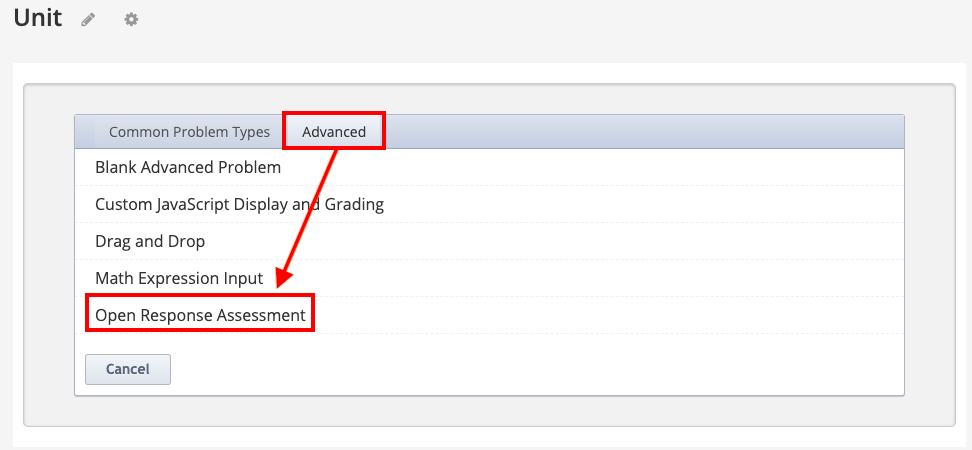
Step 2: Select the Advanced tab and then select Open Response Assessment.
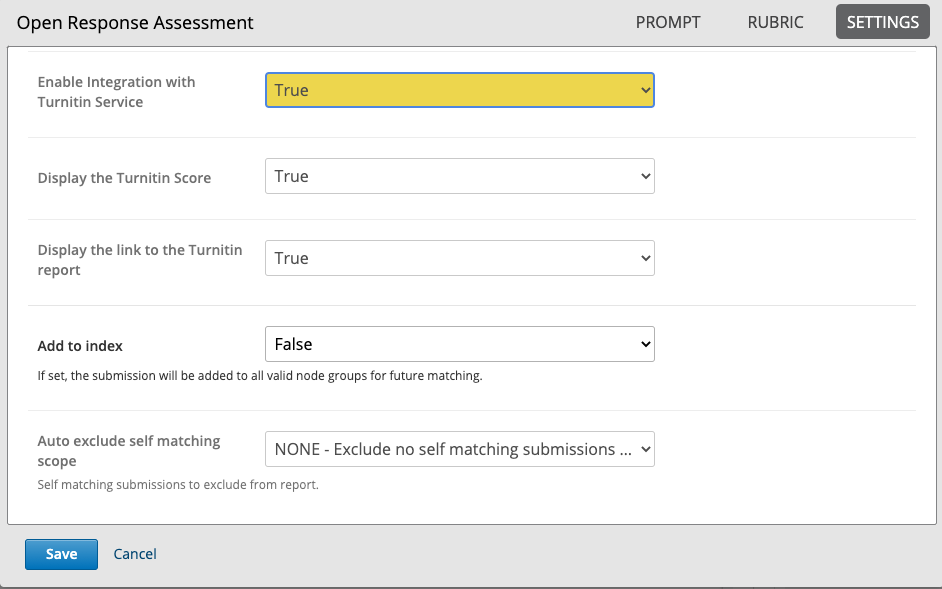
Step 3: Set up the ORA according to your needs. For set-up instructions, see the ORA Help Page. In Settings, ensure that Enable Integration with Turnitin Service is set to True.

Once the integration it set to True, additional options appear (all set to True as default). Use the following settings and then click Save:
- Display the Turnitin Score: False
- Display the link to the Turnitin report: False
- Add to index: True
- Auto exclude self matching scope: All – Exclude all self matching submissions from Similarity Report